Tmux: Setup and first steps. My personal development setup Part 1
When you start working on development, you usually focus on learning a new technology stack, but not many people try to improve their tooling skills, especially related to language-agnostic development tools.
One of those tools that helps me every day when working among different folders and projects is Tmux.
Tmux is a terminal multiplexer that allows you to run multiple terminal sessions within a single window. With Tmux, you can create multiple panes within a single terminal window, each of which can run its own application or shell. This makes it easy to work on multiple tasks simultaneously without having to switch between different terminal windows. Tmux also supports window and session management, allowing you to move and resize panes, create new windows, and detach and re-attach sessions.
There are multiple websites where you can find information about the three main components of Tmux: Sessions, Windows and Panes. Since it was difficult to understand it for me since the beginning I’ll try to present you a simple example about we can use it.
📦 Installing Tmux
macOS
In Mac, it’s pretty straightforward to install Tmux. You only need Brew for it, and then you can install it with.
brew install tmuxLinux and WSL
Depending on the distribution that you are working on, you might have different ways to install tmux. Here are the command setup line for the different distros that I’ve used in the past.
Any of these commands is interchangeable between your favorite Linux distro and your WSL distro, as long the operating system version is the same.
# Ubuntusudo apt install tmux
# Fedorasudo dnf install tmux
# Arch Linuxsudo pacman -S tmux
👟 Sessions, Windows and panes in a nutshell
Imagine that I need to work on two projects: The Potato Project 🥔 and the Sunflower Project 🌻.
We can take advantage of Sessions by creating two of them.
Per project, we need to work on the backend and frontend. We can use a Window for each of them. Inside of each window, we also need to have two Panes side by side to run npm run start and npm test simultaneously.
First, the <Prefix> key
The prefix key is the main shortcut for Tmux keystrokes. By default, it is a combination of Ctrl + b, or ^ + b on Mac.
For the next tutorials, use this shortcut. Or, if you have already changed it, use your new one.
Sessions
We will take care of the setup below in this post, but by reading the commands, we can imagine how this will work. I use short session names because if I want to get attached to a specific one later, it’s much easier to type it in that way.
tmux new-session -s <name-of-your-session>
# For the examples beforetmux new-session -d -s potatotmux new-session -d -s sunflower
# And after, you can choose what session you can jointmux attach-session -t sunflower# ortmux a -t sunflower
Now, our Tmux server has two sessions running. The -d flag is used to avoid getting attached to the session, so we can keep operating over our terminal. Remove it if you want to immediately get inside of it.
Windows
When we get attached to our session, we join our first window at the same time. The title of that window is usually the name of the shell that you are using. In my case, it is zsh, but in your case, it might be bash or another one.
Now, remember that we are inside the sunflower project. We need to create a window for the backend and another one for the frontend.
One trick to remember windows is to compare them to browser tabs.
Renaming Windows
# Inside of your sunflower session, press the following shortcut<Prefix> + , Once this is opened, type the new name of the window: backend and <Enter>
Creating a new window
# Inside of your sunflower session, press the following shortcut<Prefix> + c
# Then you'll be moved to that session, rename it to frontend<Prefix> + ,         # then type frontend and <Enter>
Moving between Windows
Now if you want to move between your backend and your frontend project. You can use.
# Move to the next window<Prefix> + n         # n of next
# Move to the previous window<Prefix> + p         # p of previous
Panes
Panes are a split of a window. I would say they are the main reason why I use Tmux, as a NodeJS developer. It’s a daily requirement to handle more than one command at the same time for Node projects.
Now, we want to have two parallel panes to run npm start in one and npm test in their side. You can create an horizontal panel with.
<Prefix> + " # I have no idea why to be honestBut if you prefer a vertical layout, use this command.
<Prefix> + % # I guess because it's compared to 0|0
Move between panes
To move between the panes we have created, you can use the <Prefix> key combined with your arrow keys. This gives us a total of four combinations: Up, Left, Right, and Down.
<Prefix> + <direction-as-arrow>📦 My custom configuration
After a year of using Tmux, I found myself searching for ways to improve my workflow. I discovered some tweaks that might be useful for you.
Each of them requires you to create a .tmux.conf file in your home directory. This applies to every operating system but Windows, excluding WSL.
Changing the prefix
I know that pressing Ctrl + b can be difficult since those keys are far apart. I replaced it with Ctrl + Space because I can press both keys with the first and last finger of my left hand.
To make this change, update your ~/.tmux.conf file as follows. We will disable Ctrl + b before moving to the new shortcut.
unbind C-bset-option -g prefix C-Spacebind-key C-Space send-prefixAn easy way to reload the config
Since we are going to make many modifications to this file, we need to have a quick way to reload the configuration. We will first show the original way and then the shortcut that I have.
The original way
You can press <Prefix> + : to open Tmux command mode and type the following command.
source-file ~/.tmux.conf # Press <Enter> after typing thisMy Custom Shortcut
In your ~/.tmux.conf file, add the following line. After writing this, if you are still running a tmux session, refresh it using the original method. Only for this time.
bind-key r source-file ~/.tmux.conf \; display-message "Config reloaded"Updating the index from zero to one
Maybe you know the popular joke about developers using 0 instead of 1 as the beginning index for counting. However, when you are using Tmux, if you want to navigate directly to the first window, you need to cross your fingers on the keyboard to execute such a shortcut. Fortunately, you can use 1 as your base index. Also, if you delete a window, the default behavior will be to leave that window number empty. You can change it as well, which is something I would recommend.
Automatically renumber a Window if one of them gets deleted
set -g renumber-windows onSet base index as 1, and also for panes
set -g base-index 1setw -g pane-base-index 1Config for a different shell
I use ZSH instead of Bash. You can always start your tmux sessions with ZSH by referencing the shell path.
You can run which zsh beforehand to know the path of your shell and replace it in the following script, where mine is /bin/zsh.
set-option -g default-shell "/bin/zsh"Moving between panels like Vim
Another optional step. As I mentioned, you can move between panes using <Prefix> + <Arrow-key>. However, if you prefer a workflow similar to Vim, you can use <Prefix> + <h | j | k | l> as your movement combinations.
If you noticed, using <Prefix> after the first time, is no longer necessary because the -r flag allows your shortcut to avoid pressing the prefix again.
bind -r k select-pane -Ubind -r j select-pane -Dbind -r h select-pane -Lbind -r l select-pane -RResizing panels from keyboard
Also, if you don’t want to use the mouse for resizing your panes, you can use the uppercase version of the same Vim movement letters. Additionally, using the -r flag allows us to use the letter for a limited time after the first <Prefix> press.
The number 5 represents the size you are resizing, and you can increase or decrease that number according to your needs.
bind -r H resize-pane -L 5bind -r J resize-pane -D 5bind -r U resize-pane -U 5bind -r L resize-pane -R 5My personal bindings
Add true color support to your Tmux sessions
To make your Tmux to work with all those fancy themes and colors that you see in different Reddit post, you might need to also configure it. Let’s indicate to Tmux to add more color support.
set -g default-terminal "tmux-256color"set -ga terminal-overrides ",*256col*:Tc"Using the mouse
If you want to use the mouse to resize your panes, o click your window’s name. You can enable it with the following line.
set -g mouse onStatus bar format
If you want to display the status bar and display the Windows number and the executed command, use the following code.
set -g pane-border-format "#P: #pane_current_command"set -g status onVi mode
If you want to have similar shortcuts to Vim for copy and paste operations, you can set up Vi mode.
setw -g mode-keys viOpen a pane in the same path from the original one
If you want to open a vertical or horizontal split and use the same path that you were using in the original split where you were located, I have two personal keybindings to do so. I use the | key to specify a vertical split and - to define it as horizontal. I also think this is a much better approach than using % and ".
bind-key | split-window -h -c "#{pane_current_path}"bind-key - split-window -v -c "#{pane_current_path}"🛠️ Installing TPM and plugins
Installing TPM
TPM is the Tmux Plugin Manager. Just like your favorite coding language, you can use plugins to add or extend functionality of Tmux.
To install it, copy the following code to the bottom of your ~/.tmux.conf. Make sure to reload the configuration afterwards.
# Load TPM in the next config reloadset -g @plugin 'tmux-plugins/tpm'
# If TPM is not installed, do itif "test ! -d ~/.tmux/plugins/tpm" \   "run 'git clone https://github.com/tmux-plugins/tpm ~/.tmux/plugins/tpm && ~/.tmux/plugins/tpm/bin/install_plugins'"
# Initialize TPM (keep this line at the very bottom of .tmux.conf)run '~/.tmux/plugins/tpm/tpm'
Some useful plugins
At some point, you may want to extend Tmux’s features. Here is my list of plugins to help you do so.
Tmux sensible
It provides many default tweaks and settings for Tmux, which I think make more sense than the original ones.
Feel free to check what those are in the official repository: https://github.com/tmux-plugins/tmux-sensible
Tmux resurrect
Maybe you have a workspace and windows+panes combo that you don’t want to lose once you restart your computer. Tmux offers a plugin that allows you to save your current layout and reuse it in the future using a shortcut.
The most important shortcuts are for saving and restoring sessions. Use <Prefix> + Ctrl + s to save sessions and <Prefix> + Ctrl + r to restore them.
More information: https://github.com/tmux-plugins/tmux-resurrect
Tmux yank
Provides a way for Tmux to share the clipboard with the operating system. Please note that you may need additional dependencies depending on your operating system. Then, with <Prefix> + y, you will be able to copy the content you have selected in your Tmux session and paste it elsewhere.
You can read more about it here: https://github.com/tmux-plugins/tmux-yank
Vim Tmux Navigator
If you are a Vim user, like me, you will want to have a smooth workflow to move between your panes and Vim splits. By default, that won’t work as you expect. Luckily, we have this plugin that needs to be installed in Vim and Tmux, and your Vim and Tmux will fit perfectly. It also works for Nvim.
You can follow the instructions shown here: https://github.com/christoomey/vim-tmux-navigator
All plugins in a code block
Here is a list of all the plugins; put them below the set -g @plugin 'tmux-plugins/tpm' line. Save, reload your configuration, and then press <Prefix> + I to install all of them. If you want to update them in the future, use <Prefix> + U.
set -g @plugin "tmux-plugins/tmux-sensible"set -g @plugin "tmux-plugins/tmux-resurrect"set -g @plugin "tmux-plugins/tmux-yank"set -g @plugin "christoomey/vim-tmux-navigator"Installing themes
Like many developer tools, you can configure your Tmux interface with themes. I’ll show you my preferred theme. Additionally, I’ll leave a link at the end where you can access a wide variety of themes.
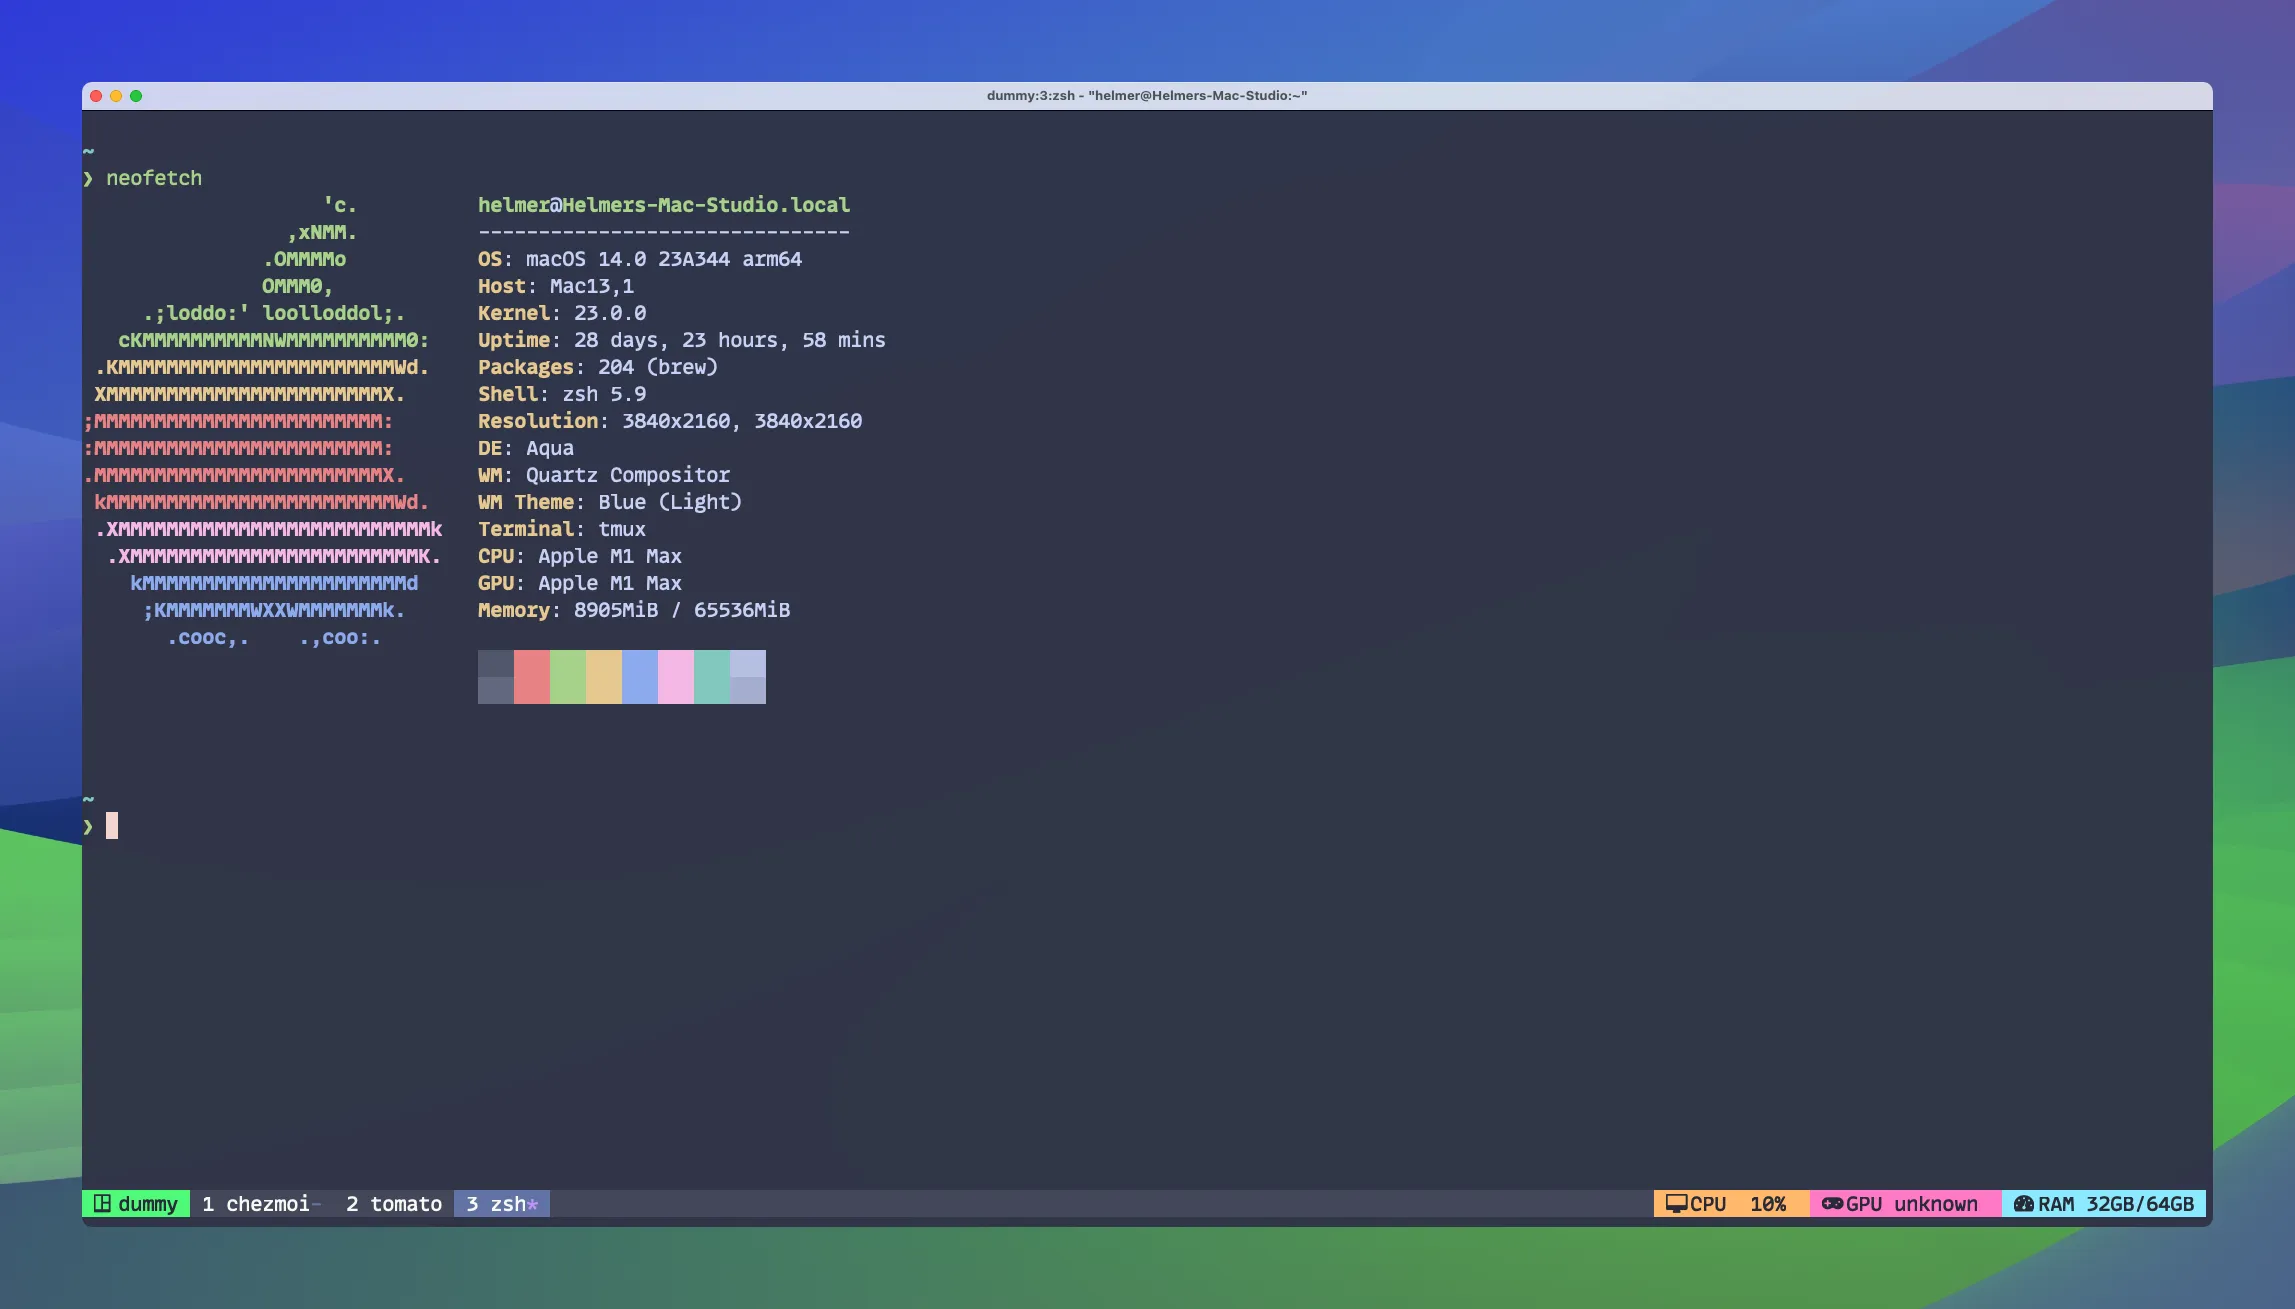
Dracula theme
It’s a nice eye-catching theme that fits black and white terminals. I’ve tested it in both. The dark gray combination with the green, pink, and orange sections makes a good match for identifying my system resources. I configured it to display my current CPU workload, GPU, and RAM usage. It also has some icons since I use Nerdfonts as my terminal font.
To install this theme, follow the same steps as you do for the plugins.
set -g @plugin 'dracula/tmux'As per my custom configuration, this is what I have for configuring the Dracula theme to fit my needs. Copy and paste them after the line where you install the plugin. If you see squares instead of icons, you can copy and paste them. As long as you are using Nerdfonts, you will see them.
set -g @dracula-plugins "cpu-usage gpu-usage ram-usage network-vpn"set -g @dracula-show-flags trueset -g @dracula-show-left-icon " #S"set -g @dracula-show-powerline falseset -g @dracula-border-contrast trueset -g @dracula-show-empty-plugins falseset -g @dracula-cpu-usage-label " CPU"set -g @dracula-gpu-usage-label " GPU"set -g @dracula-ram-usage-label " RAM"More themes
You can find many more themes in this awesome tmux repository.